How to Use Corrugated Metal for Your Next DIY Project
Corrugated metal has emerged as a versatile material for DIY enthusiasts. Studies show that the global corrugated metal market is expected to grow by 4.2% annually. This reflects its increasing popularity across various projects. The unique texture and durability of corrugated metal appeal to many homeowners and designers alike.
Many might picture corrugated metal as solely utilitarian. In reality, it can elevate aesthetics. Its use ranges from roofing to decorative features. However, one must consider the challenges. Proper installation requires careful planning and execution. Not everyone may have the skills for such intricate work.
Moreover, the environmental impact of metal sourcing should be noted. It's crucial to choose recycled materials when possible. This not only reduces waste but also supports sustainability. While corrugated metal can enhance a project, it demands responsibility and thoughtfulness in its use.
Understanding Corrugated Metal: Types and Uses
Corrugated metal has become a popular choice for DIY projects. It is lightweight, durable, and versatile. Many people use it for everything from garden sheds to interior decor. The wavy pattern provides strength while giving a unique aesthetic appeal. Knowing the types of corrugated metal is essential for any project.
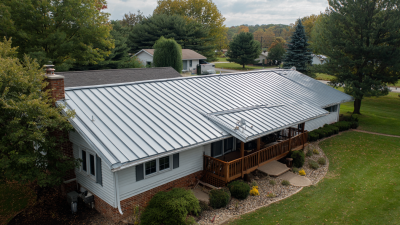
There are several types of corrugated metal available. Steel is the most common; it offers strength and resistance to rust. Aluminum is lightweight, making it ideal for smaller projects. Galvanized options have a protective coating, often used for roofing or outside structures. Each type serves a different purpose. Understanding these differences can help avoid mistakes in your project.
When working with corrugated metal, measure carefully. Even small errors in measurements can lead to misfits. Consider the edges and how they'll be finished. Sharp edges can be a hazard. Many people overlook this detail. Planning every aspect can prevent headaches later on. Use corrugated metal wisely, and your DIY project will shine.
Usage of Corrugated Metal in DIY Projects
Tools and Materials Needed for Corrugated Metal Projects
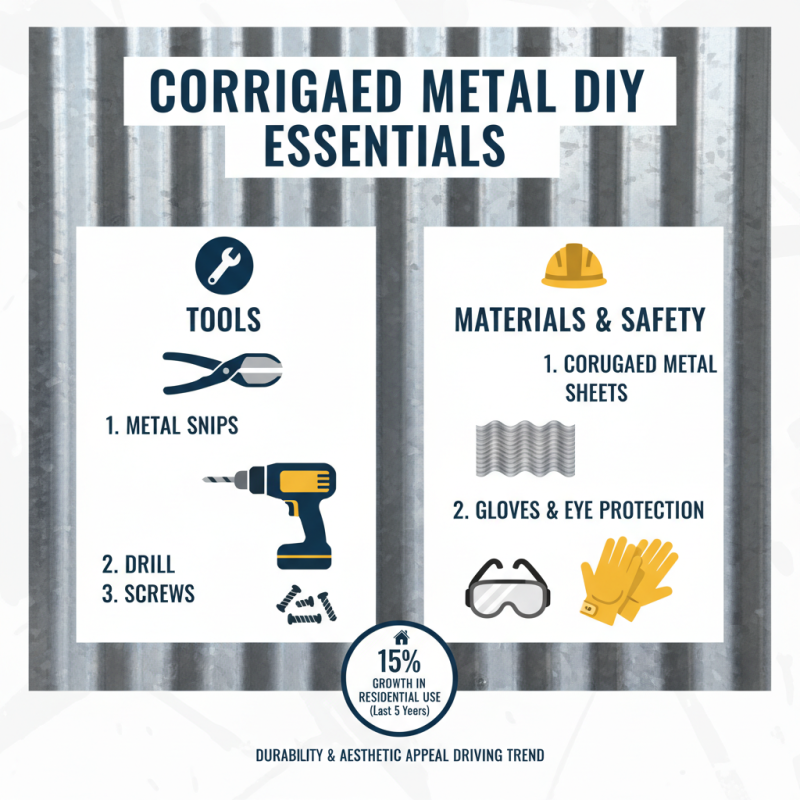
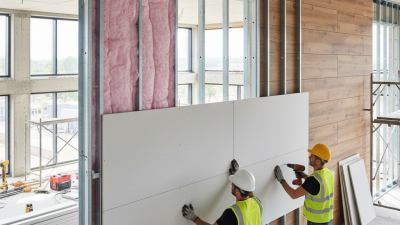
When starting a DIY project with corrugated metal, gathering the right tools and materials is crucial. At a minimum, you will need corrugated metal sheets, metal snips, a drill, screws, and safety gear. According to industry reports, the use of corrugated metal has grown by 15% in residential projects over the last five years due to its durability and aesthetic appeal.
Ensure you have a sturdy work surface. Cutting metal can be tricky, and any mistake could lead to injury or wasted materials. Many people underestimate the importance of protective gear, like gloves and safety glasses. The right safety equipment reduces the risk of accidents significantly.
Beyond basic tools, consider your design. Planning is key. Sketching a layout helps visualize the final product. Using an online calculator for measurements can prevent costly errors. The industry suggests that about 30% of DIY projects fail due to poor planning. Think about how lighting and color will interact with the corrugated surface. Balancing form and function in your project is vital, yet often overlooked. This reflection can lead to impactful designs and less wasted effort.
Step-by-Step Guide to Cutting Corrugated Metal Safely
Cutting corrugated metal can be straightforward, but safety is essential. Always wear protective gear, including gloves and goggles. Sharp edges can cause injuries if you're not careful. A stable workstation is crucial. Make sure your work surface is sturdy and well-secured to prevent accidents.
Before you start cutting, measure and mark your metal accurately. Use a permanent marker for visibility. A straight edge can help create a clean line. Popular cutting tools include tin snips and angle grinders. If using power tools, be cautious. Sparks can fly, and the metal can be hot to the touch after cutting.
After making your cuts, inspect the edges. They can be jagged and dangerous. Sand down any sharp areas to prevent future injuries. Cleaning up your workspace is essential. You can avoid clutter, which reduces the risk of accidental cuts. Remember, safety and precision go hand in hand in every DIY project.
How to Use Corrugated Metal for Your Next DIY Project - Step-by-Step Guide to Cutting Corrugated Metal Safely
| Tool |
Purpose |
Safety Tips |
| Tin Snips |
Cutting corrugated metal sheets |
Wear gloves to protect your hands |
| Safety Glasses |
Protecting eyes from metal shards |
Always wear during cutting |
| Clamps |
Securing metal sheets while cutting |
Ensure sheets are firmly held |
| Circular Saw |
For larger cuts on thick metal |
Use a blade designed for metal |
| Measuring Tape |
Measuring dimensions for cuts |
Double-check measurements before cutting |
Creative Ideas for Using Corrugated Metal in DIY Projects
Corrugated metal is a versatile material perfect for DIY projects. It adds texture and a rustic charm to any space. You can use it for walls, roofs, or even furniture. Imagine a vibrant garden shed with corrugated metal siding. The blend of metal and nature creates an interesting contrast.
In your home, consider using corrugated metal as a backsplash in the kitchen. It is easy to clean and resistant to moisture. Just be mindful of sharp edges; safety is key. You might want to wear gloves while handling it. For a personal touch, paint the metal in a color that matches your decor.
Tips: When using corrugated metal, secure it properly to avoid wobbling. Measure twice before cutting to avoid waste. Don't hesitate to experiment; sometimes, the most creative ideas come from mistakes. An imperfect edge might add character to your project.
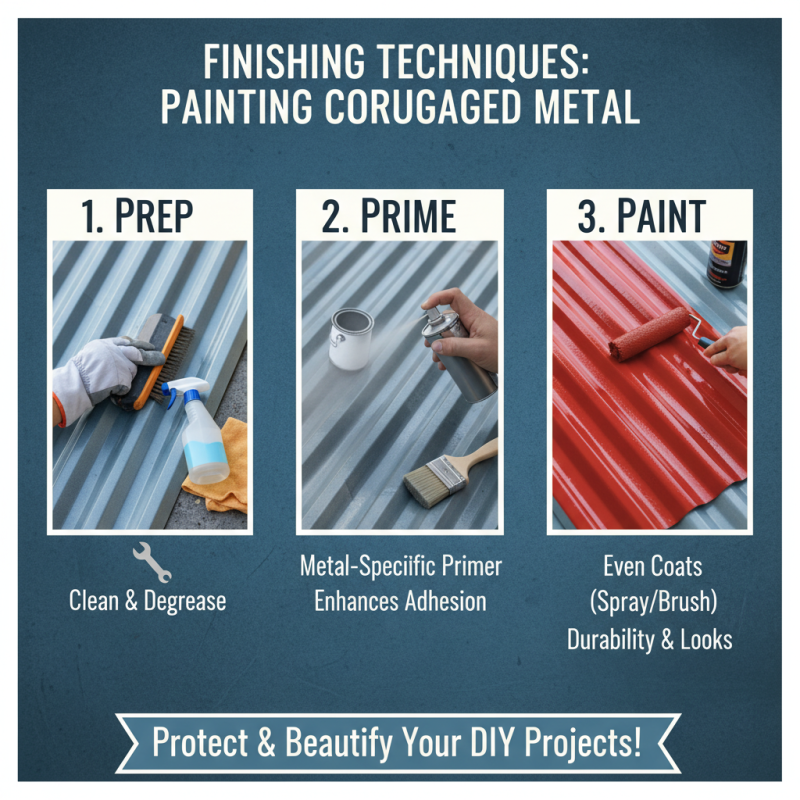
Finishing Techniques: Painting and Coating Corrugated Metal
When incorporating corrugated metal into your DIY projects, finishing techniques can significantly enhance its aesthetic and durability. Painting is a popular option. However, it is crucial to choose the right primer and paint specifically designed for metal surfaces. A high-quality primer ensures better adhesion and longevity. You should apply spray paint or brush-on paint evenly, covering every nook and cranny of the metal. It may take practice to achieve a smooth finish, so don’t rush this step.
Coating is another effective technique. A clear coat can protect your painted metal while adding a sheen. It also helps prevent rust, which can be an issue over time. Make sure to choose a coating that suits outdoor conditions if your project will be outside. Remember, applying too thick a layer can lead to runs and uneven spots. Test on a small piece before moving on to the main project. Every project teaches us something new, so don’t be afraid to experiment with these techniques.